This document describes steps to download Altera Nios Processors on to development boards. As of this writing, our department has the following boards available: DE2, Nios Development Kit Stratix Ed., and UP 3. The content of this document applies to all available boards. Follow the steps listed below to configure your PC and download existing designs to the boards.
1. Download Quartus II Web Edition and Nios II Processors from Altera. Altera provides free license for the software. In addition, you also need the Altera Univerisity Program IP Cores, which provide the additional support for components on the DE2 and Altera Debug Client, which provides the debugging environment for the NiosII processors.
2. You now need to set up the corresponding device driver for you PC. This writing only focuses on the USB-Blaster, which is the most commonly used programming hardware. Typically, your Windows OS is able to detect the connection as soon as you connect an Altera board to your PC through USB. As part of the installation process, Windows will ask whether you want to connect to software update to locate the driver or you want to locate the driver manually. Do not connect to software update, instead direct the search path to the appropriate driver directory within the Quartus installation directory (e.g. C:\altera\71\quartus\drivers\usb-blaster). Windows should now be able to install the correct driver for your programming hardware.
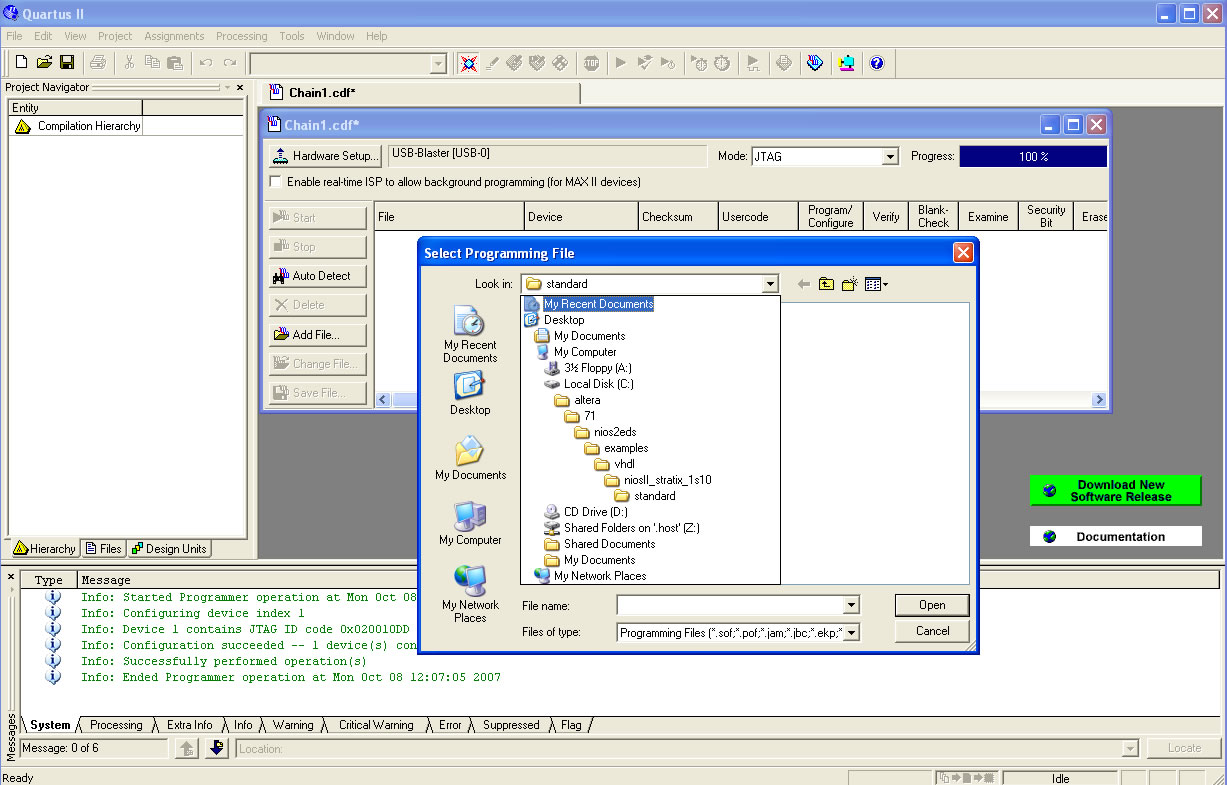
3. Launch Quartus. Under tool -> programmer, set your programming hardware to usb-blaster. Then choose "Add File" from the chain.cdf* dialog box. Go to c:\altera\71\nios2eds\examples\vhdl\ and then the corresponding FPGA technology for your board (check the board to identify the right FPGA technology). For example, if your board is the Nios DK, your FPGA technology would likely be stratix_1s10. In this case, your path would be: c:\altera\71\nios2eds\examples\vhdl\niosII_stratix_1s10. In this directory, there are many configurations of the NiosII processors ranging from minimum (no caches, no debugging functionality) to fully loaded configurations (with instruction/data caches, hardware debugger, dynamic branch predictor, etc.). Select standard directory and then click on NiosII_stratix_1s10_standard.sof. See the figure below for the location of this file.
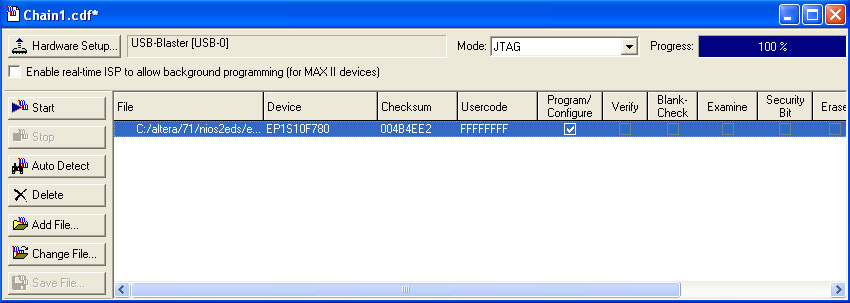
4. Click on the "programmer/configure" box in your chain1.cdf dialog box then click start (see the figure below). At this point, your board should be configured with the specified NiosII processor. For more information about the NiosII processor, refer to the following documents: NiosII reference manual, NiosII tutorial, and Debug Client tutorial.
5. Once your hardware is configured, refer to the following documents for software/hardware development.