The template matching process proceeds in three steps:
Templates consist of two types of objects: peak objects and graphics objects. Peak objects consist of: the retention time for each separation dimension, the chemical name, the group name, the constellation name, the inclusion flag, the internal standard flag, and the exclusion flag. Graphics objects consist of: the specification of the graphic object in the separation plane, the display color, the graphic name, and the inclusion flag. (An exclusion flag will be added soon.)
Selected peaks in an image can be added to the template of the image. First, select blob mode from the palette and select the blobs whose peaks are to be added to the template. (Metadata such as chemical name, etc., also should be set, as desired.) Then, click the Add to template button. Template peaks must have unique retention times, so if a template has an existing peak at the same retention times, then the new peak will not be added and a message will be displayed in a popup.
Selected graphics in an image can be added to the template of the image. First, select graphics mode from the palette and select the graphics to be added to the template. (Metadata such as graphic name, etc., also should be set, as desired.) Then, click the Add to template button. Template graphics must have unique retention times, so if a template has an existing graphic with the same specification in the separation plane, then the new graphic will not be added and a message will be displayed in a popup.
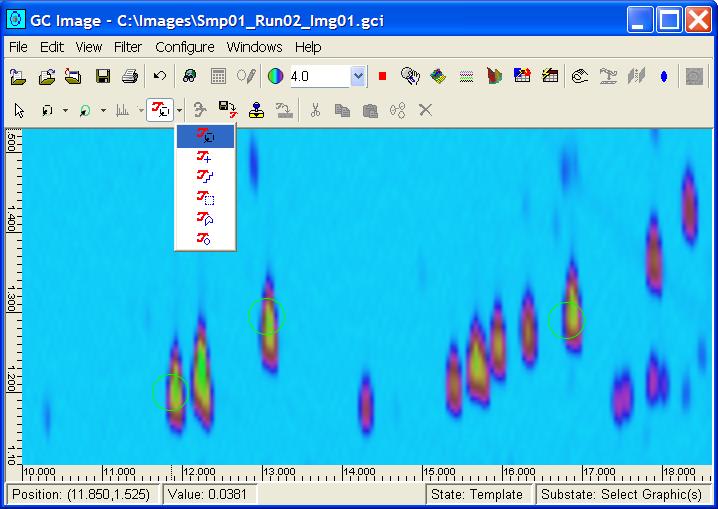
The Image Viewer palette has a button to set the cursor mode to template mode. Next to the template cursor-mode button, there is a pull-down template mode selector. The selectable template cursor modes, illustrated in Figure 1, are:
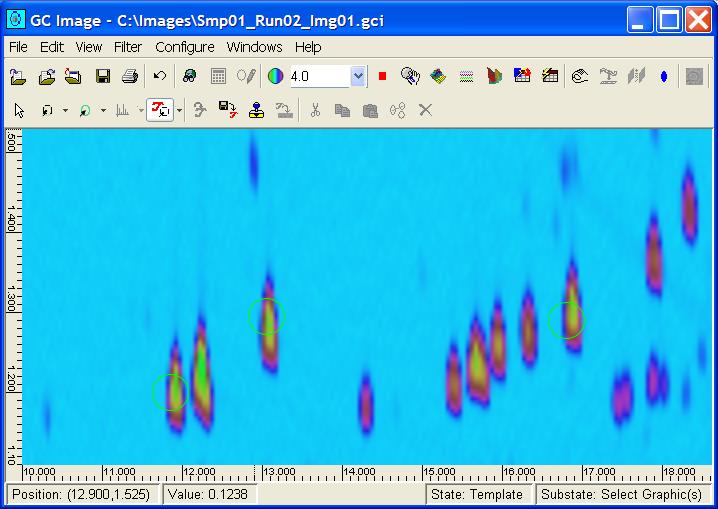
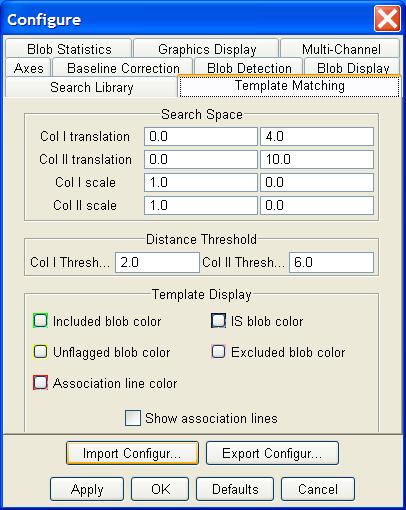
Template peaks and template graphics are displayed in template mode. Template blobs are displayed as unfilled circles and are color coded by class (included, internal standard, etc.). Template graphics are displayed with color-coded lines that are dashed, so they can be distinguished easily from image graphics if image graphics are displayed in template mode. The Template Matching panel, which is accessible from the Configure->Configure Settings interface, allows setting of visibility options and default colors for template objects. Figure 2 illustrates the graphical display for template objects. As is typical, the template peak locations in this example are slightly different than the locations of the blob peaks.
The handles of selected template objects can be used to relocate knots by using click-and-drag with the left mouse-button. A selected template object can be translated in-full by click-and-drag with the left mouse-button, beginning in the interior of the object. Multiple selected template objects also can be relocated using click-and-drag with the left mouse-button.
When a template object is selected, clicking the right mouse-button brings up a template object metadata popup, in which metadata, such as the name, can be assigned. When multiple template peaks or multiple graphics are selected, clicking the right mouse-button brings up a popup for shared metadata. These metadata popups resemble the metadata popups for blobs and graphics. (No shared metadata popup is available if both peak and graphic objects are selected.)
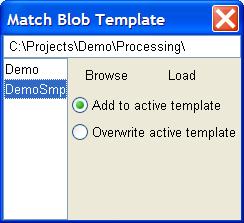
To load a template, select the Load Template option from the Filter menu or click the Load Template button. The Load Template dialog provides access to a browser that allows the user to view the template before loading (i.e., without modifying the image template). The Load Template dialog also allows the user to specify whether the selected template file is to be used to over-write the current template or is to be added to the current template. Template peaks and graphics must be unique, so any conflicting objects will not be added and a message will be displayed in a popup. Figure 3 illustrates the Load Template dialog.
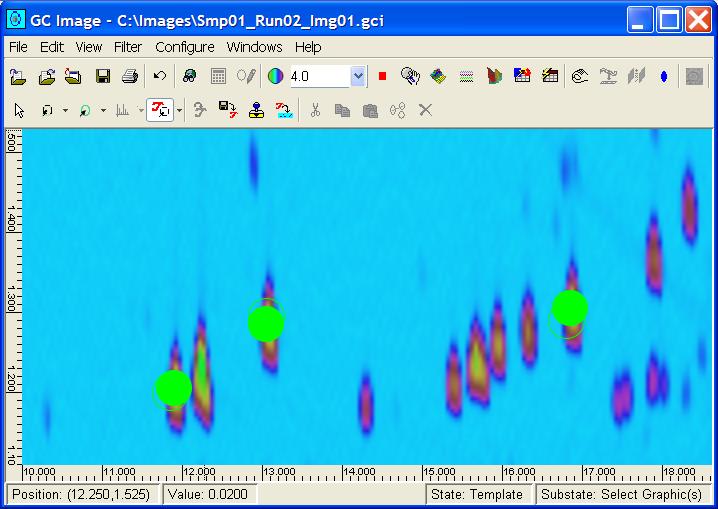
Match Template provides a visualization of the matching, but the image is not updated (e.g., blob metadata are not changed). Figure 5 illustrates the result of matching the template peaks to the image peaks. Template peak matches are shown as color-filled circles at the matched location.
If the algorithm failed to match all peaks, a popup reports the number of the total template elements applied to the image and the names of the template elements that were not applied. If the template matching algorithm does not yield satisfactory results, the user has two options:
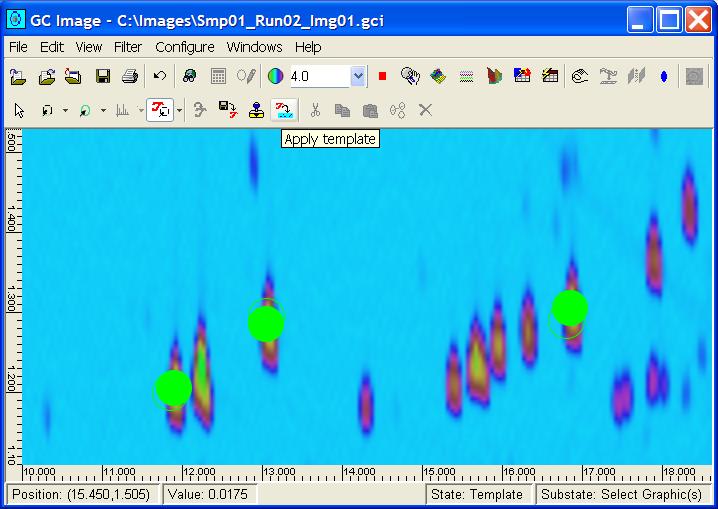
Once a satisfactory match is achieved, the metadata from the blob is applied to the image with the Apply Template option from the Filter menu or with the Apply Template button. Applying the template causes the metadata from the template peaks to be copied into the corresponding blobs (as determined by template matching). Also, template graphics are translated as determined by template matching and are copied with their metadata into the image. Figure 6 illustrates the result of applying the template metadata to the matched image blobs.
Note that even after applying the template, it is possible to modify the metadata of the blobs in the target image and the graphics objects in the target image. GC Image has tools that facilitate such changes. GC Image has tools that are especially useful for correcting mismatched blobs. The Image Viewer menu and tool bar provide access to Cut Metadata, Copy Metadata, and Paste Metadata. These allow the user to quickly transfer metadata from a misidentified blob to the correct blob. The blob must be selected with a blob selection tool before the blob metadata can be cut, copied, or pasted. Also, blob metadata can be set directly as described in chapter Detection and Analysis and graphics can be edited as described in chapter Graphics.
Contents
Previous: Detection and Analysis
Next: Configuration Files
GC Image™ Users' Guide © 2001–2004 by GC Image, LLC, and the University of Nebraska.